Learn How to Digitally Sign Executable Files Using Microsoft SignTool
If you are a software developer or distributor, maintaining the safety and trustworthiness of your software or executables is critical. It helps users feel secure when downloading and using them. Signing your executable files with a digital certificate is one of the most important steps for making sure your software is safe for end users. Without a digital certificate, your application may be flagged as unsafe by Windows or antivirus programs, causing issues for your users.
For many developers, the process of signing files, especially using tools, can feel difficult and complex. This guide demonstrates step-by-step instructions for smoothly signing the executable files with Microsoft SignTool. First, we will explain what Microsoft SignTool is and how to use it.
About Microsoft SignTool and How to Use It for EXE Signing Process
Microsoft SignTool is a powerful command-line tool for developers to digitally sign files, verify signatures, and timestamp signed files. Digital signatures need timestamps to stay valid even after the certificate expires. This way the signature remains unchanged even after the certificate is not valid. To successfully sign a file, you’ll need to buy code signing certificate issued from a trusted Certificate Authority (CA), a Windows device, along with the file or executable that you want to sign digitally.
SignTool is included by default in the Windows SDK (Software Development Kit). Just head to the Bin folder inside the Windows SDK directory, usually located at “C:\Program Files (x86)\Windows Kits\10\bin”. If not found, then you can download it through the Microsoft website.
In case you’re using Visual Studio for development, you don’t even need to look for it separately as it’s already part of the Visual Studio installation and can be accessed directly from there. You can find it by navigating to Tools > Command Line > Developer Command Prompt within Visual Studio.
Since you now have a clear understanding of Microsoft SignTool and how we can use it. In the next section, we will discuss the steps that you need to follow to sign executable files digitally.
A Complete Step-by-Step Guide to Digitally Sign an Executable File with SignTool
When you have your code signing certificate, your Windows device, and your executable all ready, you can just run through the steps outlined below to sign the file.
Step 1: Open the Command Prompt to Execute SignTool Commands
To begin, launch Command Prompt on your Windows machine, as SignTool is a command line utility tool.
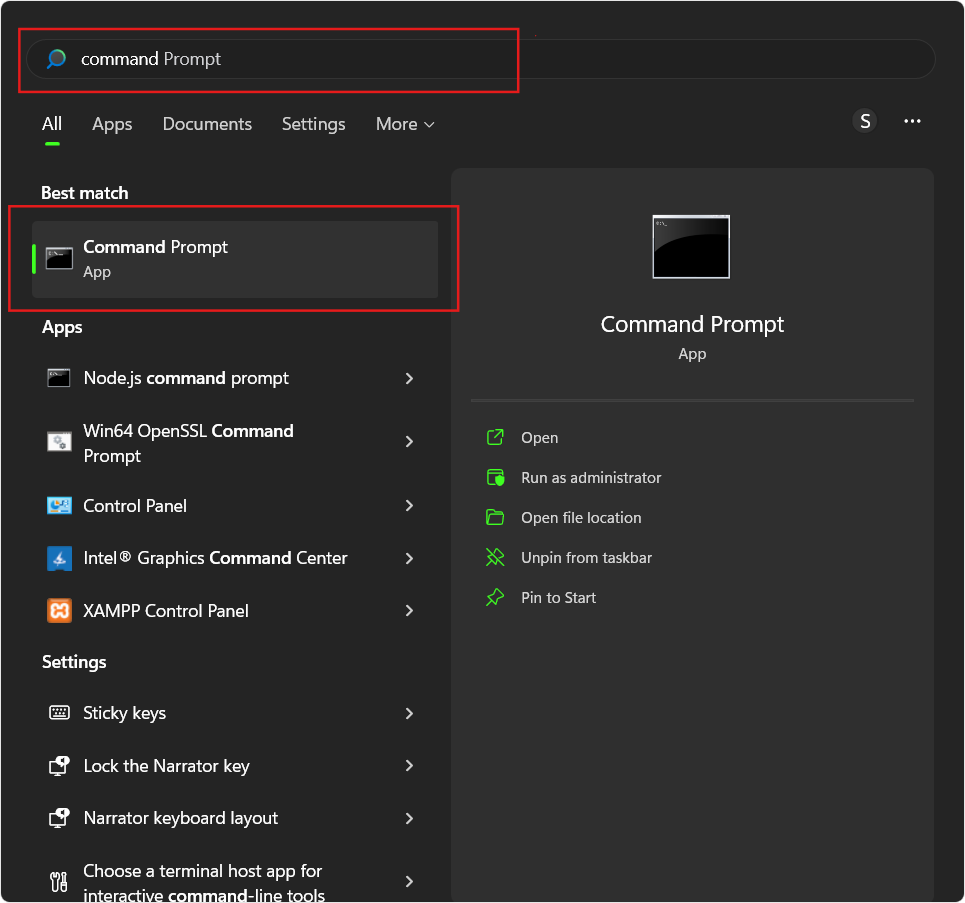
To open Command Prompt, click on the Windows button, type cmd in the search box, and select the Command Prompt option.
Step 2: Logging in with Administrator Privileges
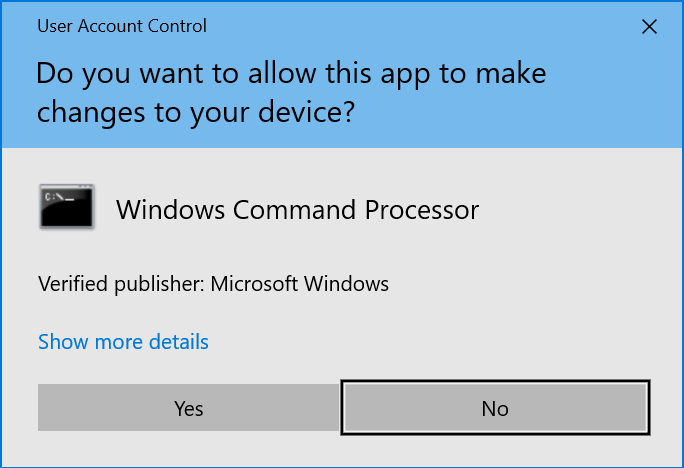
To execute SignTool commands successfully, you need administrative access. Make sure the Command Prompt is running with elevated privileges:
-
Right-click the Command Prompt icon and select Run as administrator.

-
Confirm the User Account Control (UAC) prompt to proceed.

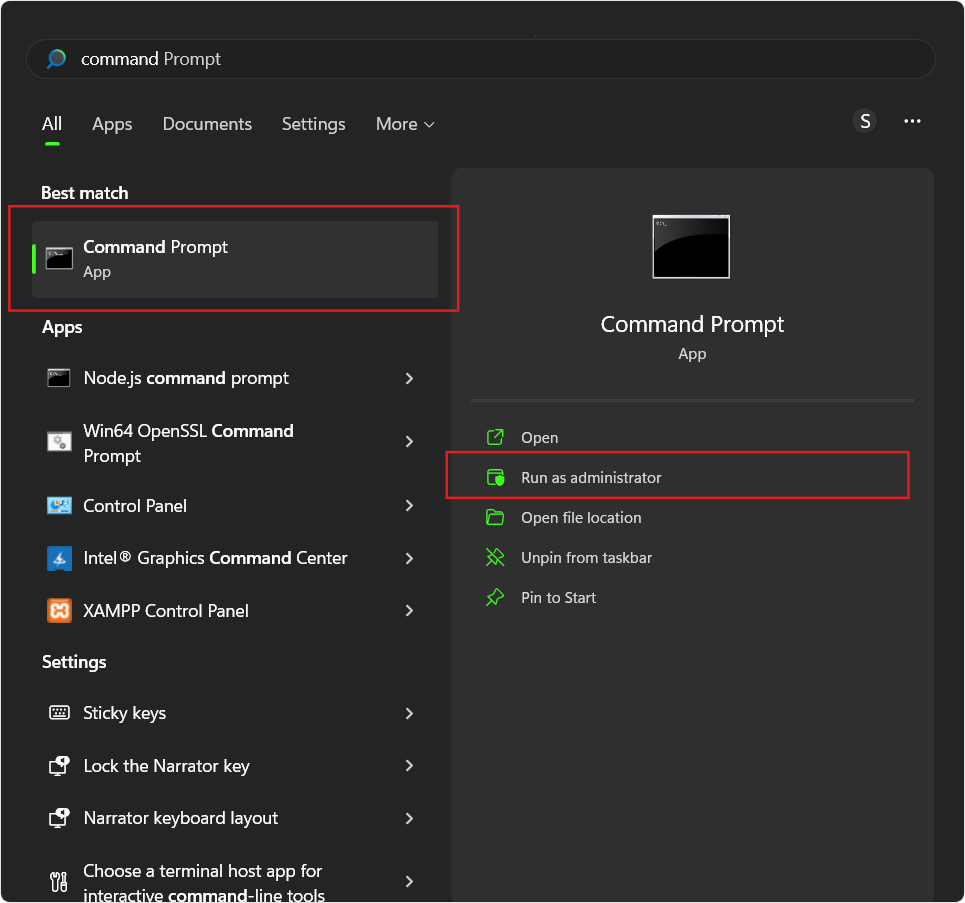
Running as an administrator prevents permission errors when signing executable files.
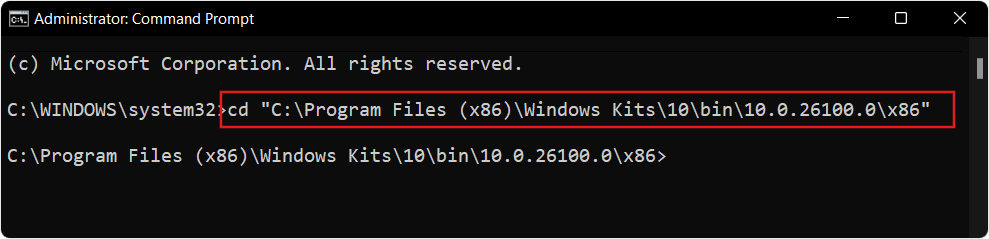
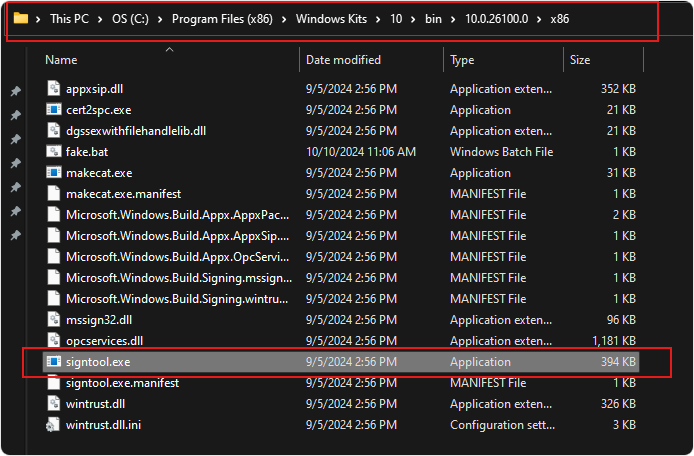
Step 3: Access the SignTool directory
Microsoft SignTool is typically located in the following directory: “C:\Program Files (x86)\Windows Kits\10\bin\<architecture>\signtool.exe”
To access the SignTool directory:
-
Use the cd command in the Command Prompt to navigate to the directory containing SignTool.

-
Alternatively, you can browse through the file manager to find the exact path of the SignTool.

Step 4: Signing Executable Files with OV and EV Code Signing Certificates
OV (Organization Validation) and EV (Extended Validation) certificates are types of code signing certificates that offer different levels of validation. To sign your executable file with either an OV Code Signing or EV Code Signing Certificate, use the following command:
signtool sign /fd SHA256 /tr http://timestamp-server.com /td SHA256 /f <CertificateFile.pfx> <FileToSign.exe>
Make sure to change “http://timestamp-server.com” to your CA’s timestamp server URL.
Explanation of parameters:
- /fd SHA256: Specifies the hash algorithm for SignTool to use.
- /tr: RFC3161 compliant timestamp server URL is used to verify the validity of a certificate after the certification expires.
- /td SHA256: Sets the secure hashing algorithm to use for the RFC 3161 compliant server that creates the timestamp.
- /f: Path to the certificate file (.pfx).
- <FileToSign.exe>: Path to the executable file.
Example:
signtool sign /fd SHA256 /tr http://timestamp.digicert.com /td SHA256 /f "C:\Certificates\MyCert.pfx" "C:\Apps\MyApp.exe"
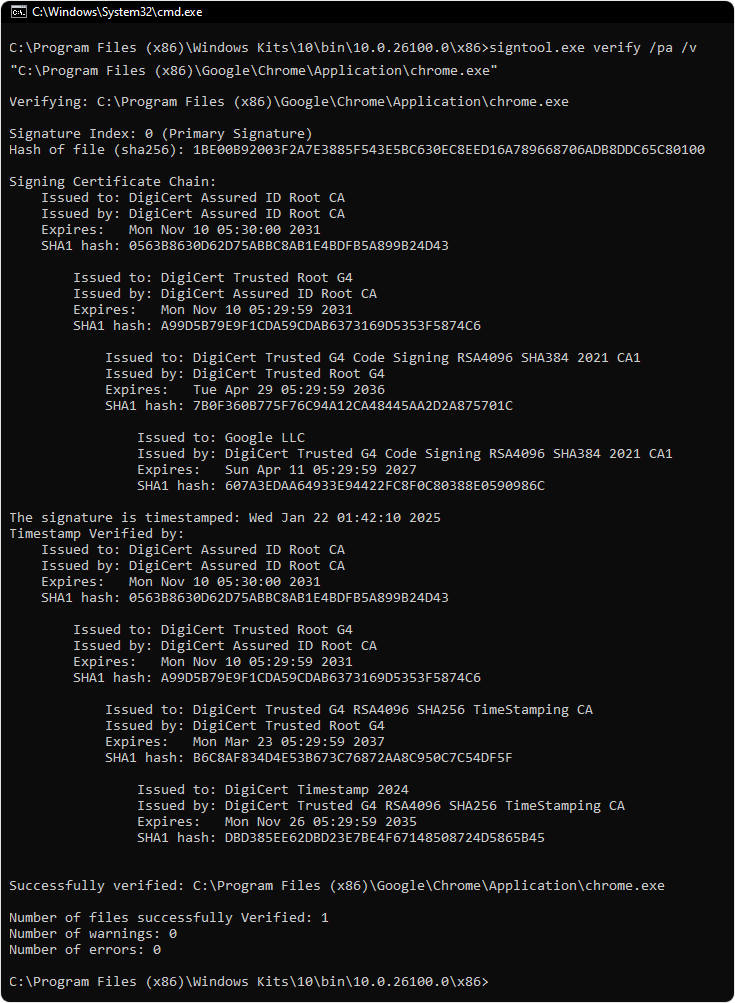
Step 5: Signature Verification
Once the file is signed, verify its digital signature to confirm its correctness. Use the following SignTool command:
signtool verify /pa /v <FileToVerify.exe>
Explanation of parameters:
- /pa: Verifies the file using the default authentication policy.
- /v: Displays detailed verification output.
Example:
signtool verify /pa /v "C:\Apps\MyApp.exe"
The output will provide confirmation through the Command Prompt if the signature is valid.
Conclusion
The Microsoft SignTool utility enables users to execute straightforward signing procedures that protect file distribution security. Digital signatures become essential for developers of all sizes because they protect their software from tampering and establish credibility with their audience.
You can sign files confidently with Organizational Validation or Extended Validation certificates using the above guidelines while performing authenticity verification that removes security warnings from your user experience.