Follow the step by step instructions to Install SSL Certificate on Microsoft IIS 8 / 8.5
After CSR generation on Office 365 using IIS 8 / 8.5, it is necessary to proceed with SSL installation and assignation. We have summarized the instruction to install and assign SSL on Office 365 using IIS-8/8.5 server.
Install SSL certificate on Microsoft IIS 8 / 8.5
- Open SSL certificate contained in Zip file and save it on desktop.
- Go to Start >> Administrative tools >> IIS manager.
-
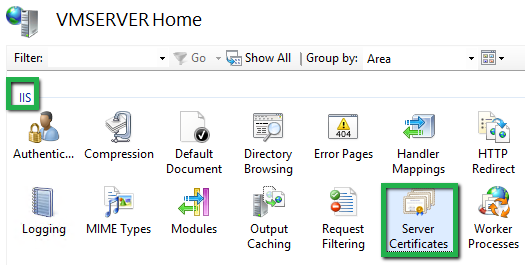
Open IIS manager and on the left side, select hostname under Connection tab. Now click on server certificates from the center menu.
-
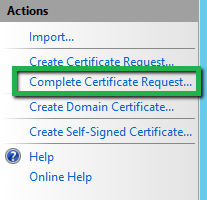
On the right side Action menu, open Complete Request Certificate wizard.
-
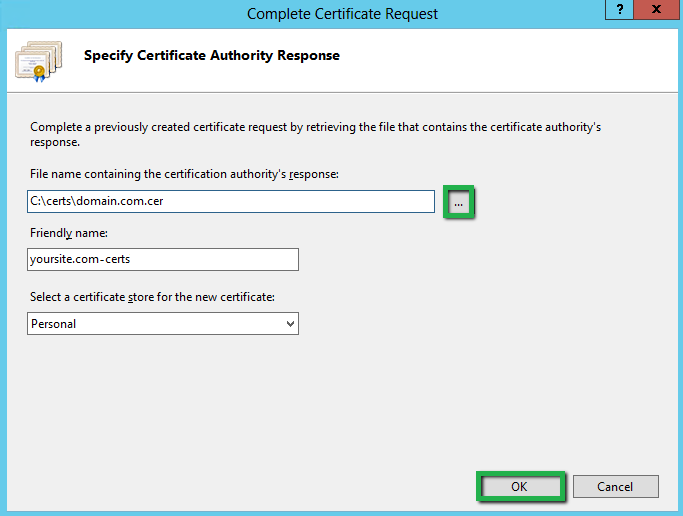
You will see a dialogue box named Specify Certificate Authority Response. Now, click on three dot (…) button to browse .cer file. Enter any friendly name in Friendly name box. Select Personal to store certificate in next drop down box. Click OK button.
- Now, your certificate is installed. Now, you have to assign the certificate to the default website.
Assign SSL certificate using IIS 8 / 8.5
- Open IIS manager, under Connection tab, browse server name >> Sites >> Default website.
-
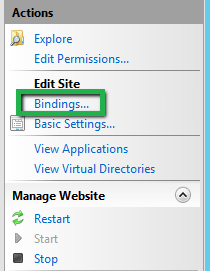
On right side in Action tab, Browse Edit Site >> Bindings option.
-
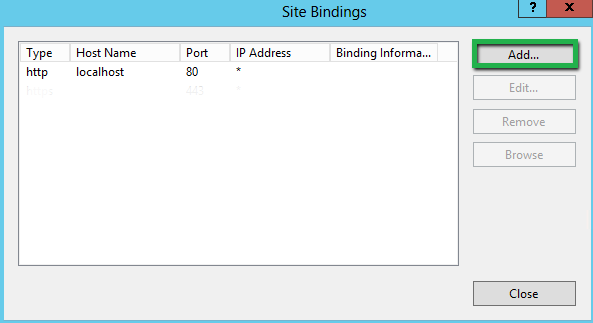
Now Click Add button in appeared dialogue box.
-
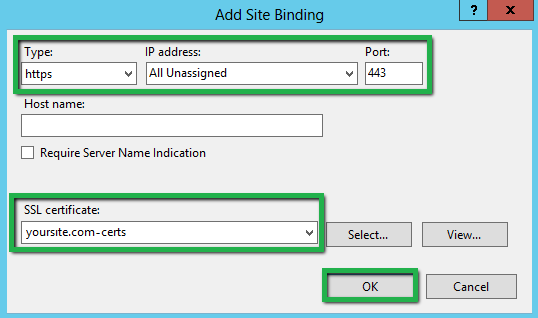
You will see Add Site Bindings box where you have to enter below details.
- Click OK button
- Your Certificate installation is completed.
SSL Installation Checker:
It is necessary to check the SSL installation as it can cause the error if it is not installed properly. To solve this issue, our SSL installation checker will help you, as you just have to enter website name and within few seconds, you will have thorough information about your SSL like serial number, key size, certificate type, etc. if any error is found, the SSL installation checker will give details about it.

