After generating the CSR on Office 365 using IIS-7, you have to follow next steps of SSL installation and allocation. For that, we have given systematic process of SSL installation on Office 365 using IIS-7.
Steps to Install an SSL Certificate on Microsoft Office365 Using IIS7 Web Server
Install SSL Using IIS-7:
- Open certificate Zip file and save it on your server desktop.
- Open IIS manager by browsing start>>Administrative tools>>IIS manager.
-
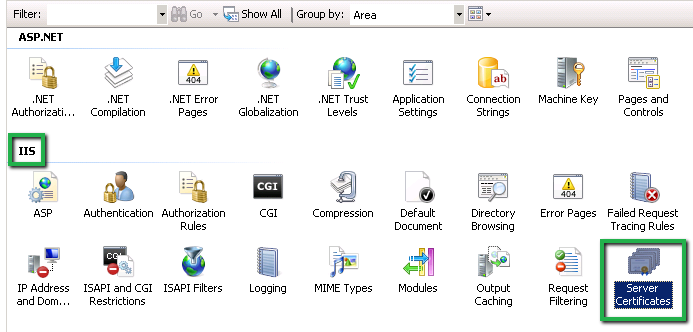
On the left Connection menu, select server host name, click on Server Certificates from the center menu.
-
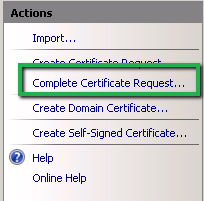
On the right side Action menu, click Complete Certificate Request and open Complete Certificate Request wizard.
-
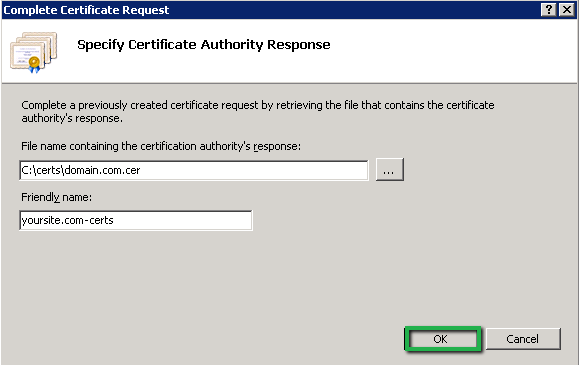
In the wizard, find the .cer file under File name containing the certification authority’s response” with click on “dot (…)” button. Enter certificate name in Friendly_name. Click OK button.
- Now, your certificate is installed. After that, you will need to assign to the default website.
Assign SSL certificate using IIS-7
- Open IIS manager, expand server name under left side Connection menu. From the list, select Default website.
-
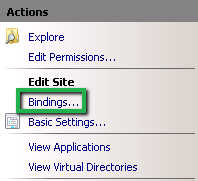
On the right side in Action menu, Browse Edit Site>>Bindings option.
-
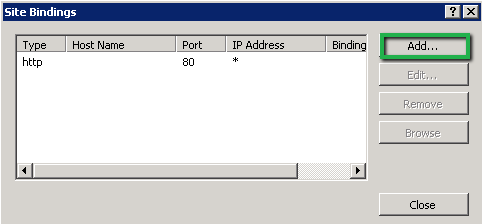
A box will appear where you have to click on Add button.
-
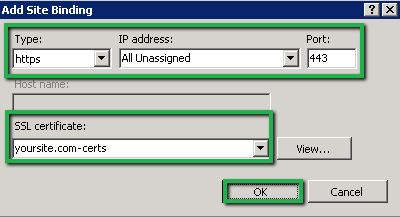
Finally, fill the details in Add Site Bindings window and click OK.
- Your SSL certificate is finally installed.
SSL2BUY SSL Checker:
SSL2BUY brings a SSL checker tool that diagnoses the certificate installation and check whether it is installed perfectly or not. The SSL installation checker will let you know about details like type of SSL and server, key size, issuer name, serial number, etc.

