If you are looking for instructions to install your SSL certificate on Microsoft Lync Server 2013, then here at we are enlightening the step-by-step process to avoid difficulties throughout the installation.
Before following below given steps, make sure that you have created a Certificate Signing Request (CSR) process and certificate file issued by certificate authority. If not, then generate CSR on Microsoft Lync Server 2013 and purchase your preferred SSL certificate from our broad range of SSL certificate products.
Once you generated CSR and ordered your certificate, you can go through Lync Server 2013 SSL installation guide.
Microsoft Lync 2013 – SSL Installation Guide
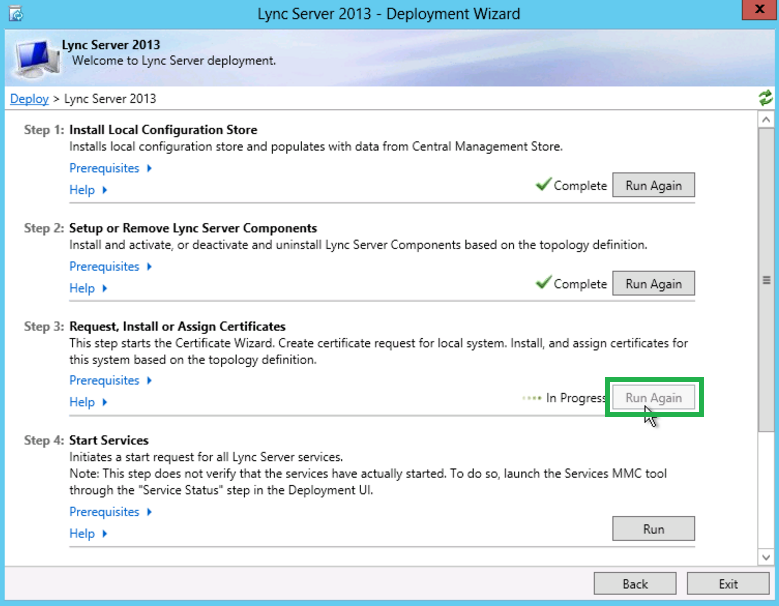
- Open the Lync Deployment Wizard.
-
Go to the Step 3: Request, Install or Assign Certificates option and click on Run Again.
-
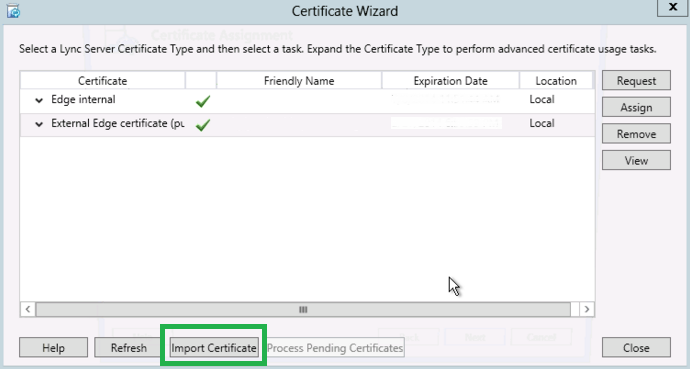
Certificate Wizard will open, Choose External Edge certificate option and click on Import Certificate.
-
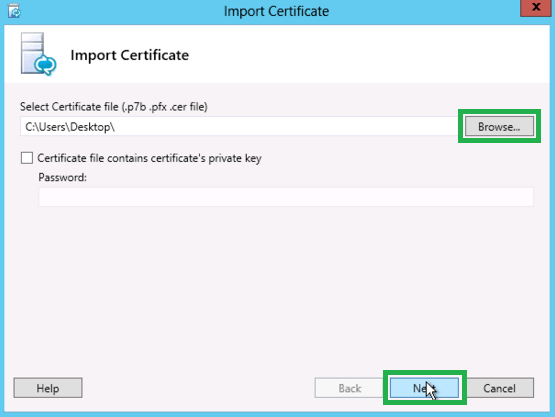
Import Certificate screen will open. Now simply Browse your certificate file. If your selected file contains the private key then check Certificate file contains the certificate’s private key and type the Password. Click on Next button.
- You will see your given information on the Summary page, just verify it and click on Next.
-
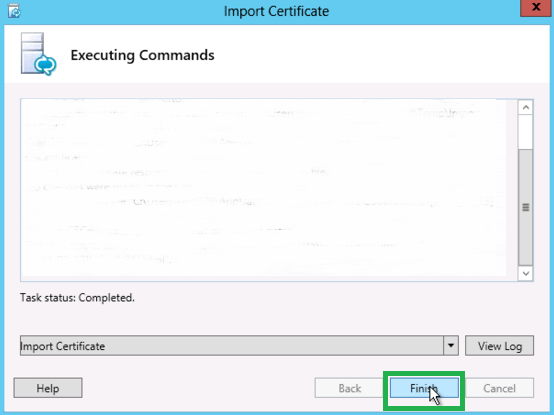
Confirm the Task status: Completed and click on Finish.
-
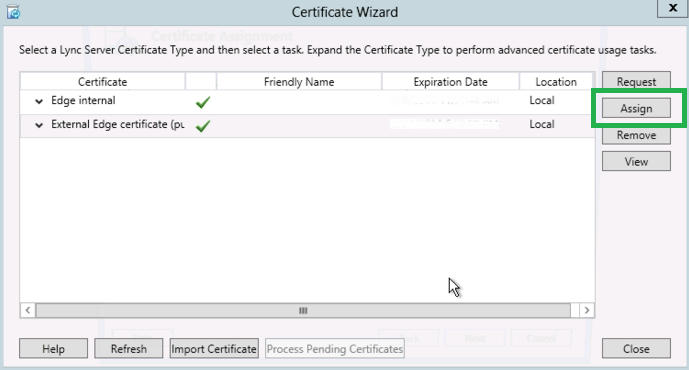
Go back to Certificate Wizard. Ensure all services are checked under External Edge certificate option and click on Assign button.
- Certificate Assignment window will appear, just click on Next.
- Certificate Store window will open, click on Next after confirming all the certificate assignment details.
- Just verify Task status: Completed on Executing Commands page, and then click on Finish.
Your SSL certificate installation process has been completed on Microsoft Lync Server 2013.
