Detailed guide to install intermediate and primary SSL certificate on Microsoft Exchange Server 2016 and 2013.
After creating the CSR in MS Exchange 2013, 2016 server, you should purchase a UCC SSL certificate to your Microsoft Exchange Server 2013 and 2016. You need to submit your generated CSR during configuration process; CA will issue your certificate via email after confirming your request for the certificate. Now, it is time to install SSL certificate on Microsoft Exchange 2013, 2016. First, download the ZIP file which contains the SSL (your_domain_name.cer) and Intermediate CA certificate. Now you should unzip and save those files on the server where you wish to install the certificate.
Create a Certificate Snap-in
- First, click on start button and open run window.
- Type MMC (Microsoft Management Console) and click OK.
- You will have the mmc screen, click on File in the menu bar and select Add/Remove Snap-in.
- Now, select Certificates in Add/Remove Snap-in and click Add tab.
- Select Computer Account and click Next button.
- Select Local Computer and click on Finish button.
- In the Snap-ins list window, click Close.
- In the Add/Remove Snap-in window, click OK
- Save these settings for future.
Install the Intermediate CA certificate
- Now, from the left panel, Right click on Intermediate Certificate Authorities
- Click on All Tasks > Import
- In the certificate import window, click Next button.
- Browse Intermediate certificate and click Next button.
- Select Place all certificates in the following store and choose Intermediate Certification Authorities from Select Certificate Store window.
- In the Certificate Import Wizard window, click Next button.
- Click Finish, Click OK
- Close the MMC window, and then click No to remove the MMC console settings.
Install SSL certificate on Microsoft Exchange Server 2013 and 2016
After installing intermediate SSL certificate on MS exchange server 2013, 2016 you need to install primary SSL certificate on the server for which you can follow below procedure.
-
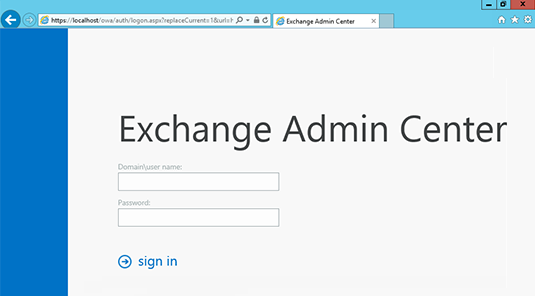
Now, access Exchange Admin Center and use domain/username and password to log-in.
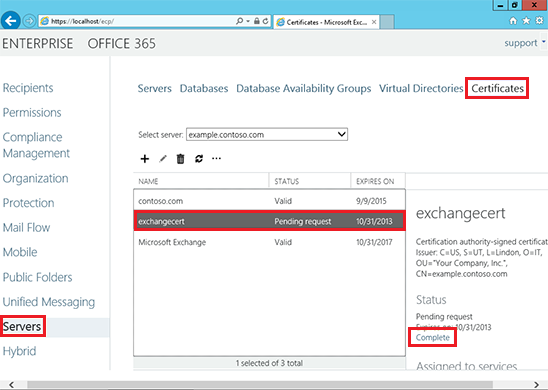
- On the left side of the server screen, click on Servers and then click on Certificates tab on top of the right side.
-
You will have a certificate with friendly name, select the certificate (showing pending request) and click on Complete on the right side column.
-
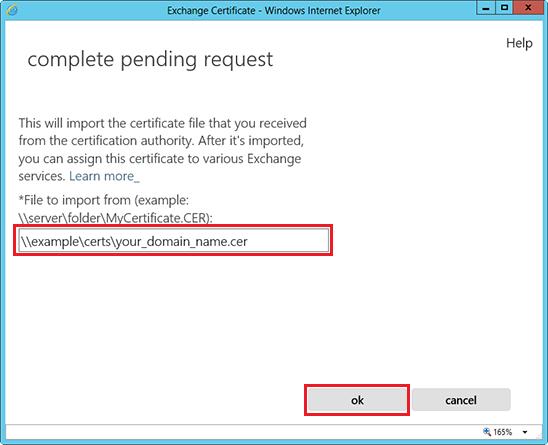
In next screen, enter the network path of your located certificate and click on OK.
-
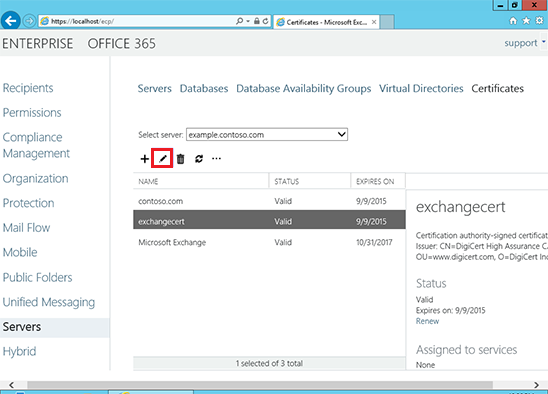
Now, enable the certificate by going back to the certificate section of the Exchange Admin, click on the edit button for highlighted certificate.
-
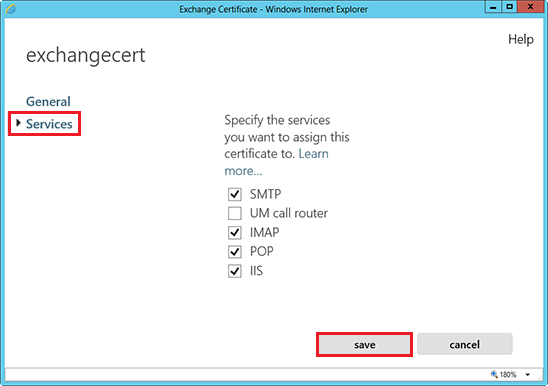
You will have a screen where you have to click on Services tab on the left side, it will give you options of different services that you wish to enable. Click on save button.
- Your SSL certificate is finally installed and ready to use.
SSL Installation checker
After completing the above installation process, it is quite necessary to check whether the certificate is installed properly or not. In that case, SSL2BUY installation checker will help you a lot, as the installation checker will give information like SSL algorithm type, server type, key size, serial number, certificate issuer name, etc.
Related Articles:
How to Generate CSR and Install SSL Certificate on Microsoft Exchange Server 2019?
How to Generate CSR in Microsoft Exchange Server 2016, 2013
How to Generate CSR on Microsoft Exchange Server 2010
How to Install an SSL Certificate in Microsoft Exchange Server 2010

