Mac OS X Lion server is designed and operated for Apple’s IOS and OS X devices. It allows mutual services like file and print service and sharing, directory service and authentication, mail services, distributed computing, meeting scheduling, contact synchronization and many more. As we know that every server needs a firm security to deal with transmitting information. In this article, we will go through SSL certificate installation to make Mac OS X Lion Server more robust.
After purchasing the SSL certificate, you will receive an email containing a zip file includes root certificate, intermediate certificate, and primary certificate. Just download the file and save it to the server directory.
Steps to Import and Install SSL Certificate on Mac OS X Lion 10.7 Server
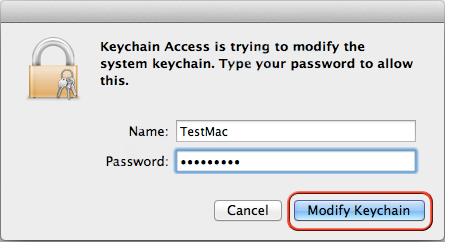
- Double click on the SSL certificate .crt file to Mac OS X Lion server. It will ask about to provide administrator credentials to add an SSL certificate to the system keychain.
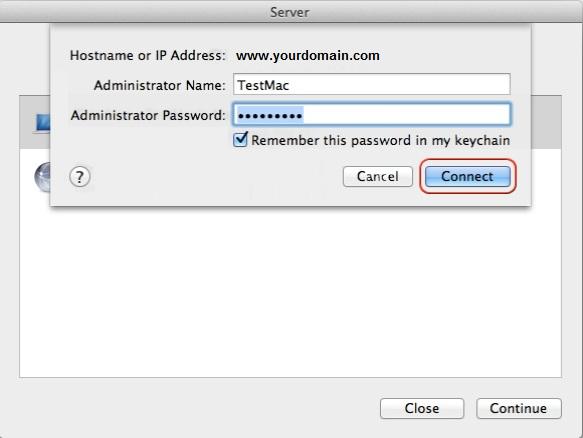
- Now, open the server app and choose the type of Mac server. Enter your login details.
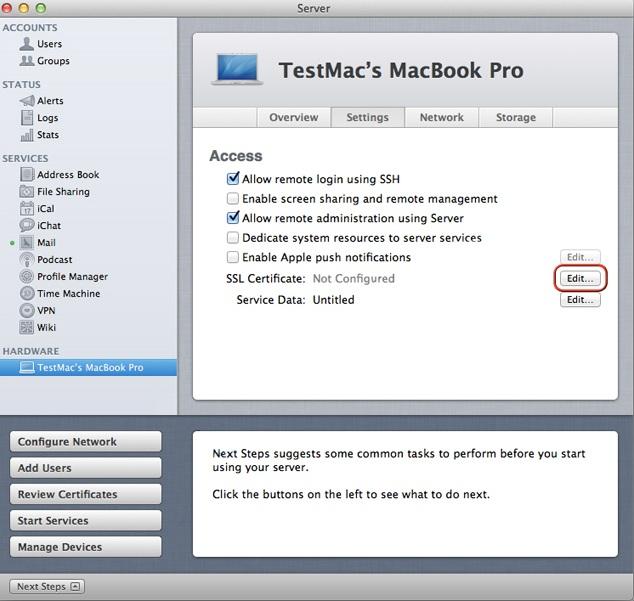
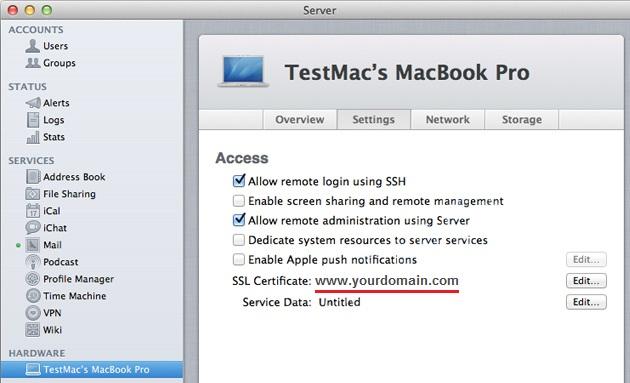
- Under Hardware section, select server name and click on “Setting” tab. There will be “Edit” option next to “SSL certificate”.
- Now open “Action” menu and select “Manage Certificates”.
- A new dialog box will appear where you have to press “Add”(+) button.
- Choose “Import a Certificate Identity”.
- Now drag private key and certificate to the dialog box and click on the “Import” button.
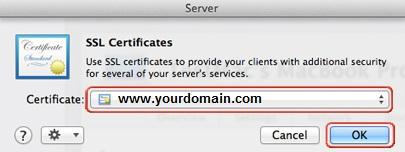
- A pop-up menu will appear, just select the imported SSL certificate.
- Finally, you have successfully installed SSL on OS X Lion 10.7 Server and you can check it under the “setting” option.
Check your SSL Installation:
After installing SSL certificate, you can check your SSL installation properly with our SSL checker tool that will give you an in-depth idea about SSL certificate details. You will have information about the algorithm, key size, server type, certificate issuer, and other information.
