InterWorx comes with excellent system graphics, the single interface for easy server management and scalability for load balancer that put it ahead of other web hosting control panels. The InterWorx Hosting Control Panel is a web hosting and Linux server management system that provides two sub tools,
- NodeWorx provides admin and reseller level interfaces which help the server admin to command their servers.
- SiteWorx presents webmaster level interfaces that help website administrators for overseeing the operations of their website.
Every web hosting Control Panel needs to establish a strong security environment for secure operation. In this piece of information, we will talk about the installation of SSL certificate in SiteWorx.
Before installing the SSL certificate on SiteWorx, you have to generate a private key and the CSR for successful SSL installation.
Setup a Private Key:
- Click on the SSL Certificates item in the SiteWorx Control Panel.
- In content filed, you will look at the SSL Certificates controls.
- Click the Setup Private Key button.
- If you have any current private key, you should paste it into the given box then click on Install.
- On the contrary, you have to generate a Private Key and for that, click on the Generate button.
- You will see the message “Private Key created “at the top of the screen.
Generate the CSR:
To generate the CSR, you have to login Siteworx and click the SSL certificate in the control panel menu.
- Again, look at the main content field and browse SSL certificate controls.
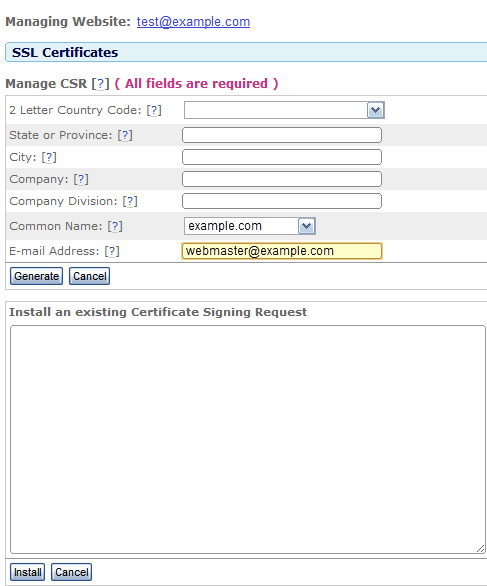
- Click on Setup Certificate Signing Request (CSR) Link.
- Now, you will get the form and fill out all fields.
- Click on the Generate button.
- Your CSR is generated and there will be a message at the top of the screen “CSR created”.
Install SSL Certificate:
- In Siteworx Control Panel, click on SSL Certificates.
- In the main menu, browse SSL Certificates controls in the main content area.
- Click on the Setup SSL Certificate link.
- Now, open your certificate with Notepad and paste the content in a given box.
- Click on the Install.
- Your SSL certificate is installed with a message showing “Certificate installed successfully”.
Check Your SSL Installation:
It is quite necessary to check the SSL installation as it may cause a potential error if not checked. Our SSL installation checker will help you in this area. Just give website name in the given box and you will have detailed information about your installed SSL, which will give you throughout knowledge about it.
