A Step-by-Step Instructions to Install an SSL Certificate for Filezilla Server
- Once you enroll for SSL certificate, SSL provider sends you a .pem file in the email that contains the intermediate and primary certificate.
-
Open FileZilla server Options in FileZilla Server and browse and click on Edit > Settings.
-
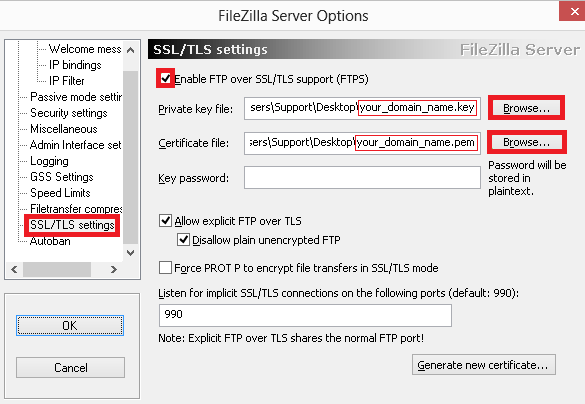
You will have a FileZilla server Options window, on the left side select SSL/TLS settings.
- On the right side, select Enable FTP over SSL/TLS support.
- In Private Key file, browse the location of the key file (created at the time of CSR).
- In Certificate file box, enter .pem certificate file.
- Enter Key Password in Key Password box. (Note – not applicable for the CSR generated using OpenSSL)
- Click on the OK button and Restart the server.
- Your SSL certificate is now installed.
SSL installation Checker:
SSL2BUY carries SSL checker tool that analyzes the certificate installation and assures whether it is installed completely or not. The SSL installation checker gives details like type of SSL and server, key size, issuer name, serial number, etc.

