Whether it’s due to a server location change, switching hosting providers, load balancing, scaling, or any other reason, you might find yourself required to copy or move your SSL certificate from one web server to another. This process can become challenging if you aren’t aware of the technical steps involved in SSL certificate management and migration. If you’re facing such an issue or have questions like how to move or copy SSL certificates from one server to another, this article will provide you with information on the same.
Steps to Migrate SSL Certificate from One Server to Another Web Server
From a general point of view, no matter which web server is used, you can migrate the SSL certificate, whether it’s a single-domain SSL, multi-domain SSL, or wildcard SSL, from one server to another web server through these three below-mentioned steps:
- Export SSL & chain certificates with an associated private key from the current web server.
- Check that you’ve converted the SSL certificate in the required format (e.g., .pfx, .crt, .key) to assure compatibility with the web server on which you’ll install it.
- Import the SSL certificate from trusted SSL Certificate provider to the new web server for the intended domain.
Step 1: Migrate SSL Certificate from One Server to Another in cPanel
-
Logging Into cPanel
The very first thing you’ll do is log into your cPanel account to use the right tool. You can get the login page for cPanel by going through https://domain-name.com:2083 and then log into it like below:
 For guidance on SSL installation, refer to this article on installing SSL in cPanel
 -
Navigating to the Security Section
Once you log into your cPanel account, scroll down and navigate to the Security section, which looks something like this:

-
Selecting SSL/TLS
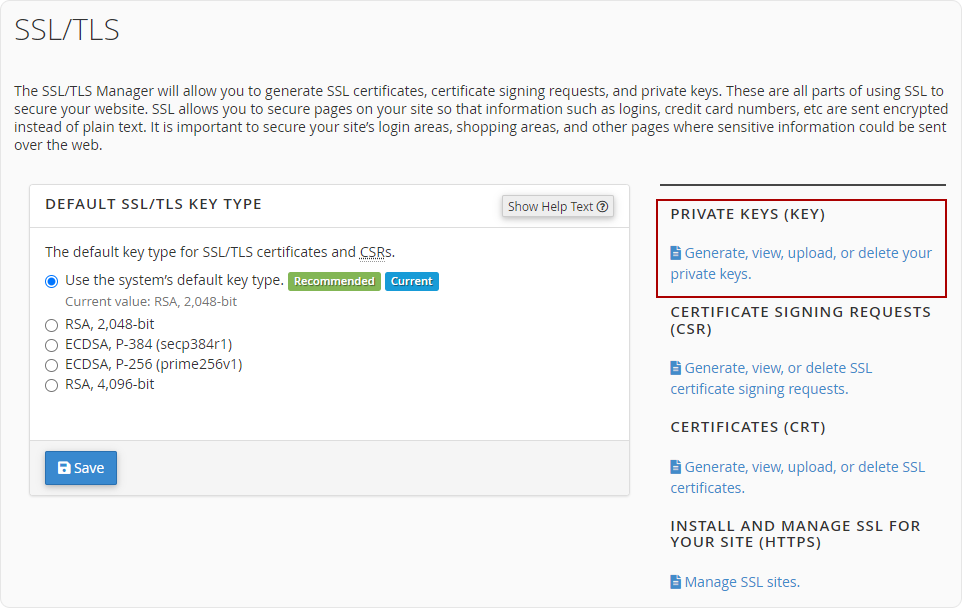
Select the SSL/TLS option from the Security section.

-
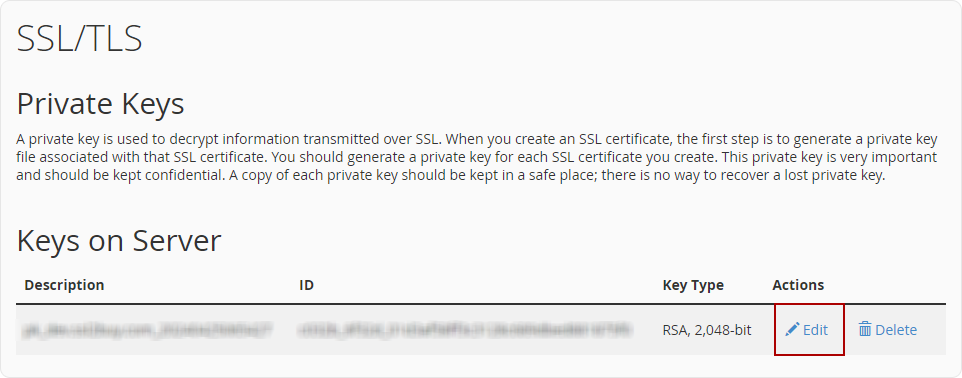
Copying Private Key
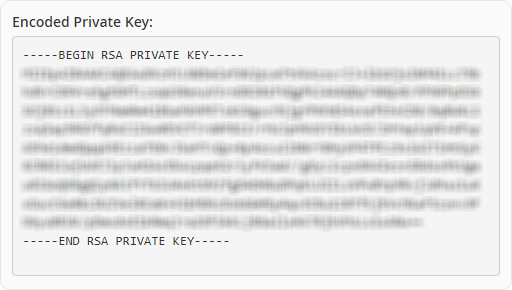
Click the first Private Keys (KEY) option from the list to generate, view, upload, or remove your private keys. Then select the Edit option on the private key you wish to move. Copy the private key from the field Encoded Private Key, save it somewhere else safely, and close it.
 Note: You’ll need to include “—–BEGIN RSA PRIVATE KEY—–” and “—–END RSA PRIVATE KEY—–” at the time of copying the private key.
-
Paste Private Key & Certificate
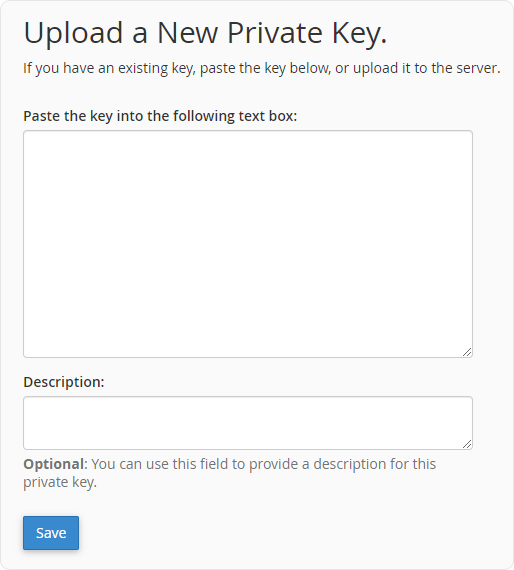
On the new web server, log in to cPanel and go to the SSL/TLS page. Click the Generate, view, upload, or delete your private keys option, and then paste the copied private key into the Upload a New Private Key field and press the Save button.
Next, upload your SSL certificate. Use the Generate, view, upload, or Delete SSL Certificates option on the same SSL/TLS page. Paste the certificate in the designated field and save your changes.

-
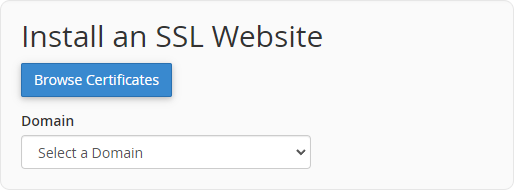
Installing SSL Certificate
Again, go to the SSL/TLS page and select Manage SSL sites under the Install and Manage SSL for your site (HTTPS) section. Further, click Browse Certificates and select the SSL certificate you’re looking to install on the server. Now, select the domain on which you want to install an SSL certificate. All fields should be filled automatically. If not, manually paste your SSL certificate & private key under the correct fields and click on Install Certificate.


Steps to Move or Copy an SSL Certificate from One Windows Server to Another Windows Server
Follow the given steps below to transfer your SSL certificate from one Windows server to another:
Step 1: SSL Certificate From the Current Windows Server
- Click the Search on the taskbar.
- Type IIS & hit Enter.
- The IIS (Internet Information Services) Manager window opens.
- Find and select on server where your SSL certificate is installed.
- Click the Server Certificates.
- Right-click on the SSL certificate you’re looking to export.
- Go through the list and select Export.
- Now, follow the below steps within the Export Certificate box
- Enter the file location in the Export to field.
- Enter the password in the Password box.
- In the Confirm Password box, type the same password again.
- Click OK.
Step 2: Conversion of SSL Certificate Extension
There’s no reason to convert your SSL certificate extension, as you’ll export your installed SSL certificate from the Windows server and install it to another Windows Server.
Step 3 : Importing the SSL Certificate to Another Windows Server
- Click the Search option placed on the taskbar.
- Type IIS & hit the Enter button.
- Once you press the Enter button, the IIS (Internet Information Services) Manager window will open.
- Under the tab named Actions, click on Import.
- The dialog box named Import Certificate will open.
- Within the box Import Certificate, follow the below steps:
- In the Certificate file (.pfx), enter the path of the exported SSL certificate.
- Within the Password box, type the password you used while exporting the SSL certificate.
- Lastly, click the OK
Once you complete the steps mentioned above, your SSL certificate will be easily moved or copied from one Windows server to the new Windows Server. The only thing required from your end is to bind the imported SSL certificate to the website for which it is issued.
Steps to Move or Copy an SSL Certificate from a Windows Server to an Apache Server
Go through the process given to move or copy SSL certificate from a Windows server to the Apache server.
Step 1: Exporting an SSL Certificate & Private Key
- Press the Windows + R buttons simultaneously.
- Enter MMC in the Run dialog box and press OK or hit Enter.
- User account control may ask for permission. Select Yes.
- Console will open. From there, select the File list and click on Add/Remove Snap-in.
- Select and click on Computer Account and press Next.
- Select Local Computer and choose Finish.
- From the left pane, click on plus (+), placed beside Certificates.
- Expand the Personal folder, then click on the Certificates folder.
- Now, select and right-click on the SSL certificate you’re looking to export.
- Find the All Tasks option and then click on Export.
- Certificate Export Wizard will open; there, click the Next button.
- Click Yes, proceed to export the private key, and then select the Next button again.
- Select and click the checkbox beside to: Include all certificates in the certification path if possible.
- Click Next.
- Enter & confirm the password and then click Next. (Password is needed to import the certificate onto another server, which is Apache in this case.)
- Select Browse, then save the .pfx file to the location you want.
- Give a name to that file like ssl-cert-example.pfx.
- Click the Next button and then Finish.
Step 2: SSL Certificate Conversion
Use the OpenSSL command stated below and create a text file that contains the data of the .pfx file.
openssl pkcs12 -in ssl-cert-example .pfx -out ssl-cert-example .txt -nodes
Copy the Primary & Intermediate SSL certificate and associated Private Key to its text file along with the tags “—–BEGIN PRIVATE KEY—– and –—-END PRIVATE KEY—–” using a text editor like Notepad. Now, give the names such as ssl-cert-example.key and ssl-cert-example.crt and save them.
Step 3: Configuration of Apache Server
Before you start configuring the Apache server, you’ll have to transfer the certificate and key files to it. Similarly, you can use an SCP or SFTP client to upload the files to the server’s location, like “/etc/ssl directory.” Likewise, assure that the Apache server has the necessary permissions to read the certificate and key files; otherwise, the Apache server will not be able to read files.
Follow the Below Steps for Configuring the Apache Web Server
- Add the directives into the Apache configuration file like:
SSLCertFileExample/path/to/certificate.crt
SSLCertKeyExample/ path/to/private.key
- Now, restart your Apache server.
systemctl restart apache2
Once completed, your SSL certificate will be successfully transferred and configured on the Apache server.
Steps to Move or Copy an SSL Certificate From an Apache Server to a Windows Server
To copy or move an SSL certificate from an Apache server to a Windows Server, go through the below steps:
Step 1: Exporting an SSL Certificate & the Private Key
Run the below command for exporting the SSL certificate and its associated private key from an Apache server to a Windows server:
sudo openssl pkcs12 -Export -out certificate.pfx -inkey private.key -in certificate.crt
- The above command will export your SSL certificate and convert it into a.PFX extension.
- Copy the converted .pfx file into the Windows server through a secure method like SCP (Secure Copy Protocol) or SFTP (Secure File Transfer Protocol).
- On a Windows server, use MMC (Microsoft Management Console) and the Certificates snap-in for the .pfx file installation.
Step 2: Server Configuration
- Click on Search, type IIS Manager, and hit the Enter button.
- Once the IIS Manager window opens, select the website you want to secure using SSL.
- Through the right pane, under the section Action select and click Bindings and click Add button.
- Upon clicking the Add button, the Add Site Binding windows will be displayed.
- Select HTTPS through the Type list. From the SSL certificate dropdown, select the imported SSL certificate from an Apache web server and click the OK button.
Upon the completion of the above steps, you’ve completed moving or copying an SSL certificate from Apache server to a Windows server. You can also refer to the Apache server SSL certificate installation guide for further help.
Steps to Move or Copy an SSL Certificate from Tomcat/Java Server to OpenSSL
In order to transfer or copy an SSL certificate from a Tomcat/Java server to an OpenSSL server, you have to first export the private key and SSL certificate and then convert the .p12 file to a separate certificate & key files, and then install an OpenSSL.
Step 1 : Exporting the SSL Certificate From the Tomcat/Java Server
For exporting the SSL certificate, follow the below command:
keytool -importkeystore -srckeystore keystore.jks -srcstoretype JKS -destkeystore certificate.p12 -deststoretype PKCS12
Step 2: Converting the .p12 file into the Separate Certificate & Key Files
Use the following command to convert the .p12 file into a text file:
openssl pkcs12 -in certificate.p12 -out certificate.txt -nodes
Step 3: Installing SSL Certificate Into an OpenSSL Server
- Open the certificate.txt file with a text editor like Notepad.
-
Copy of all the information in that file to separate certificate & key files.
- For the certificate, include the content between —–BEGIN CERTIFICATE—– and —–END CERTIFICATE—–. Save this as a .crt
- For the private key, include the content between —–BEGIN PRIVATE KEY—– and —–END PRIVATE KEY—–. Save this as a .key
- Save that certificate & key files in an appropriate location.
- Now, edit an OpenSSL configuration file to specify the location that you used to save the certificate and key files.
- Lastly, enable SSL for the website that you wish to protect.
Upon completing the above steps, you’ve successfully moved or copied an SSL certificate from a Tomcat/Java server to OpenSSL. If needed, you can refer to the installation guide for SSL certificates on Tomcat servers.
Wrapping Up
We hope your question about how to move or copy SSL certificates from one server to another is answered and you’ve got a proper understanding of the same. Also, after moving or copying your SSL certificate to the new web server, you’ve to consider a few things before the domains on the web server get properly secured with an SSL certificate, and they’re:
- Activation of HTTPS in WordPress CMS or any other you may be using after the installation into your hosting server.
- Make sure the website doesn’t have any warning messages like mixed content, as it can prevent users from visiting your website.
- Maintain rankings in SEO after HTTPS migration because an incorrect setup of HTTPS can be considered as insecure as HTTP.
