Plesk is a user-friendly WebOps hosting platform with a control panel used by world’s leading web professionals. This Plesk hosting platform offers innovative features grants developers to build secure websites while simplifying the entire process of web administration.
To install an SSL certificate, you need to generate a certificate signing request (CSR) and order an SSL certificate. This step-by-step guide will help you to generate a private key and a certificate signing request (CSR) on the Plesk Onyx (version 17) control panel.
Generate CSR on Plesk Onyx (version 17):
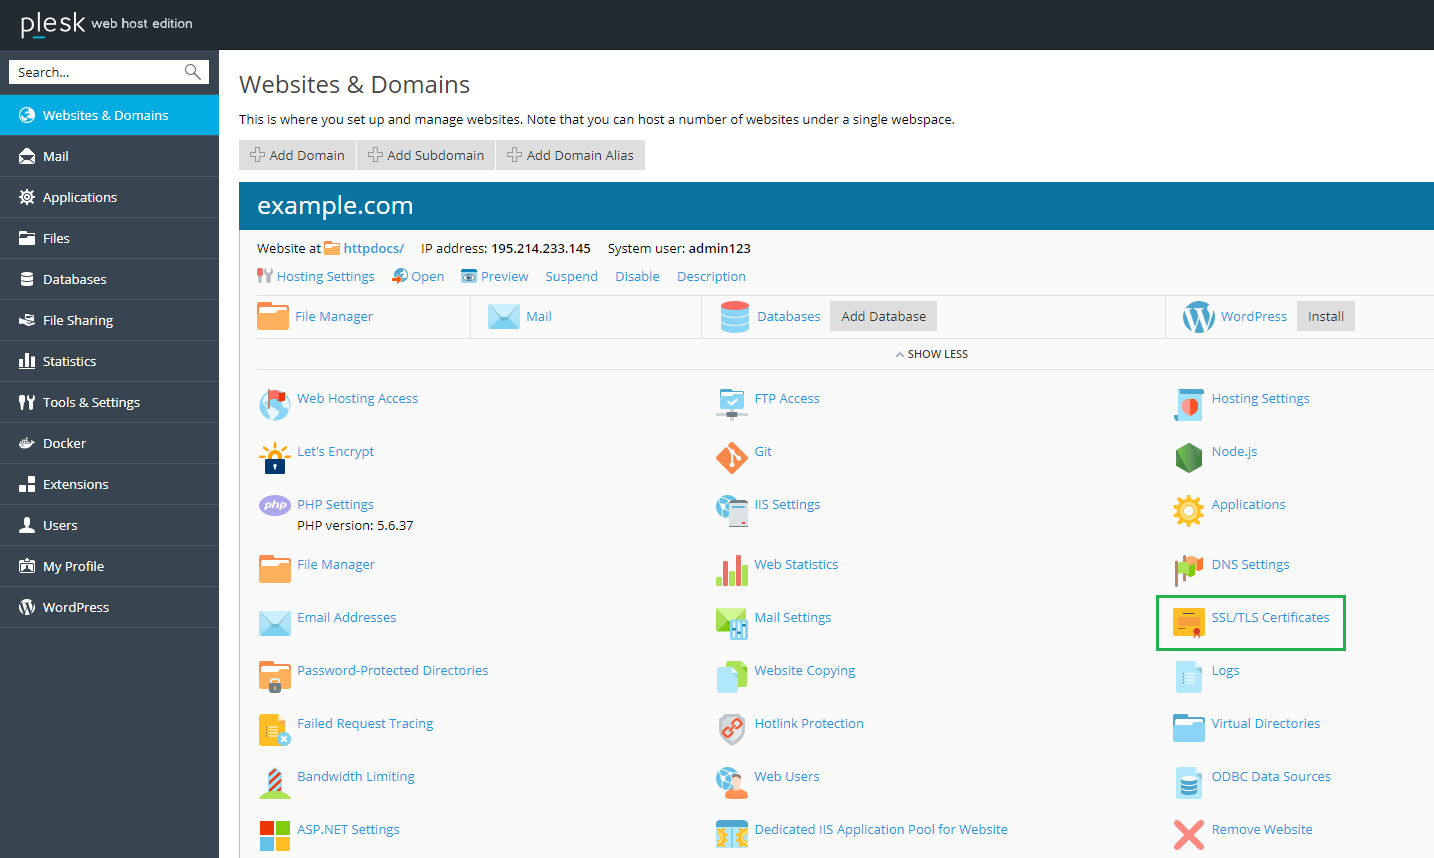
Step 1: Log in to your Plesk Control Panel with an administrator account and select ‘Websites & Domains’ tab from the left-hand menu. This step helps you to choose a domain name for which you want to purchase an SSL/TLS certificate. If your domain is not added, you can add domain using ‘Add Domain’ option available in Plesk.
Step 2: Here, we have added example.com domain. Subsequently, navigate to the ‘SSL/TLS Certificates’ menu.
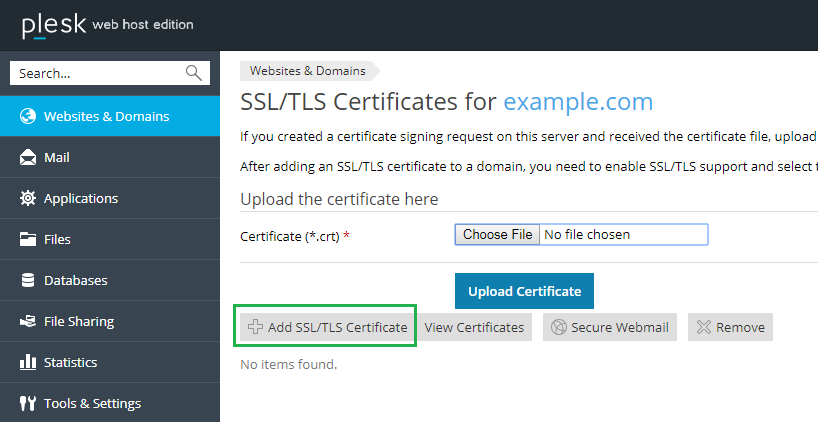
Step 3: Then, you need to click on the ‘Add SSL/TLS certificate’ button to generate a request for a certificate.
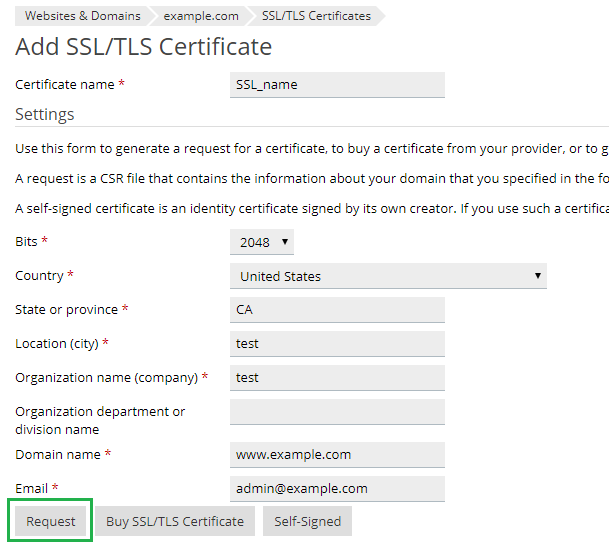
Step 4: On Add SSL/TLS Certificate page, you need to specify your ‘Certificate Name’, which is used to identify your SSL certificate among other SSLs on the server. Further, you need to specify the following certificate parameters that will help you generate the CSR code:
- Bits: Choose 2048 as encryption level of your SSL certificate (In Plesk, 3072, 4096 Bits are available)
- Pick your country name from the drop-down list and provide a name of state or province, Location (City), Organization name (company), a name of the department that your company is operating, Domain name and website administrator’s Email address.
Step 5: Make sure all necessary information is entered correctly in the form, then click the ‘Request’ button.
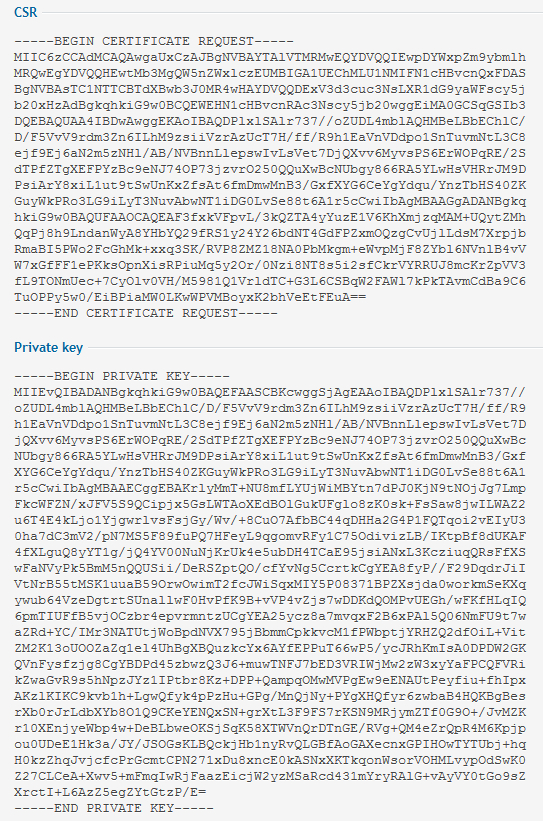
Now, you will have generated a Private key and CSR code using the Plesk control panel. Below is a screenshot of your generated CSR and the Private Keycode.
Now, you should submit the CSR file to the Certificate Authority to purchase an SSL certificate. Once CA verifies your CSR request, SSL/TLS Certificate will be issued in the form of either a *.crt file or *.pem file. After generating the CSR code and Private Key, you are all set to proceed with the installation of the SSL certificate on Plesk Onyx version 17 control panel.


