A Brief Guide to Enable an SSL Certificate on iPhone or iPad
SSL is termed as secure socket layer that secures communication takes place between the sender and receiver with strong encryption. SSL can be implemented on Email exchange servers that work on IMAP mail protocol. Before enabling SSL on iPhone or iPad, it is necessary to know your POP or IMAP email server setting. In this article, we will go through the process of enabling SSL on iPhone or iPad whether you use existing mail account or a new email account. By enabling SSL in iPhone setting, you will have continuous security protection and it prevents the third party from observing your emails.
Enable SSL on Incoming Email Server
-
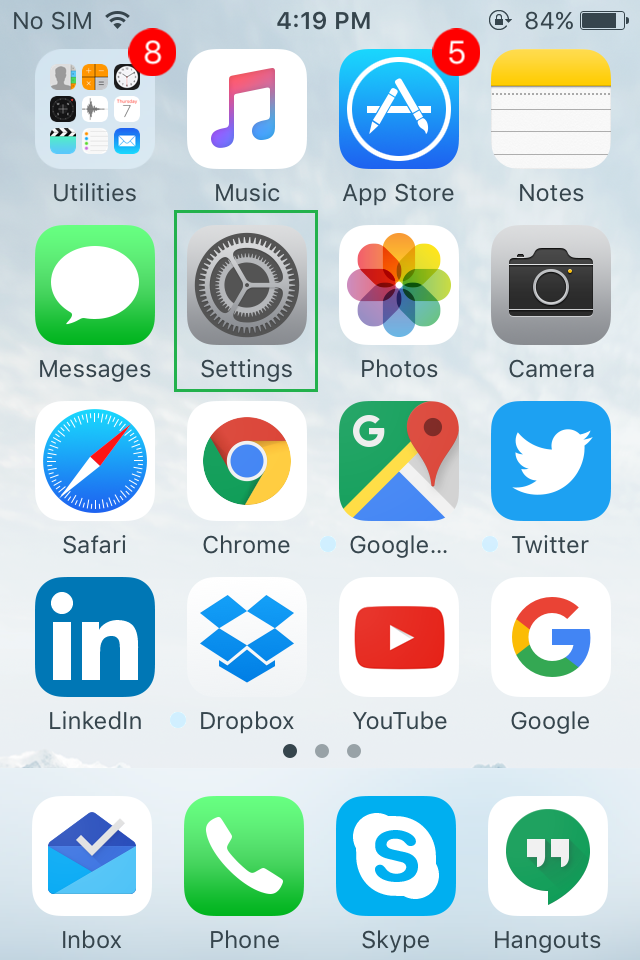
Browse Homepage, click on “Settings” tab.
-
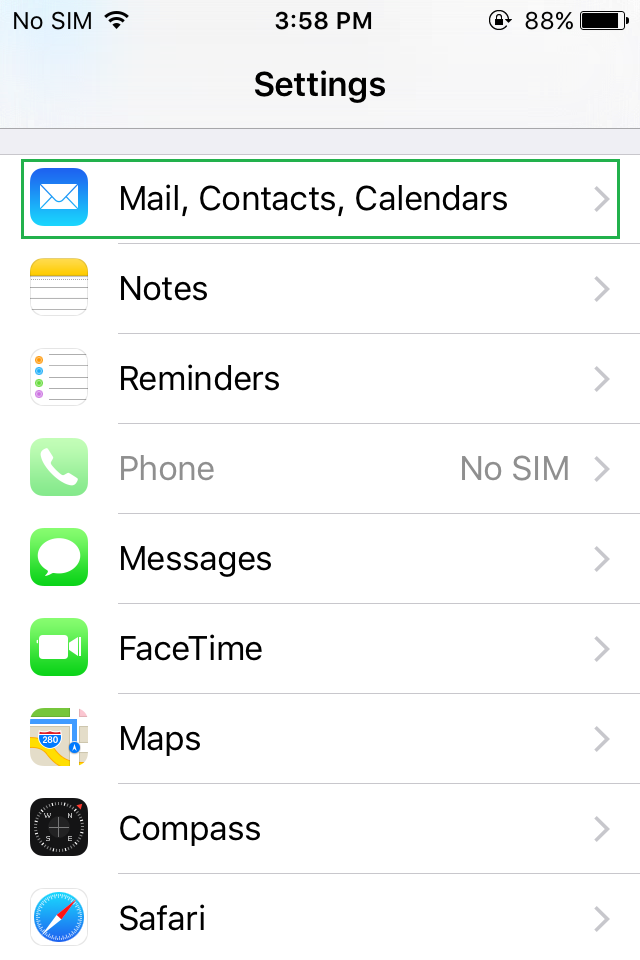
Under setting menu, click on “Mail, Contacts, Calendars”.
-
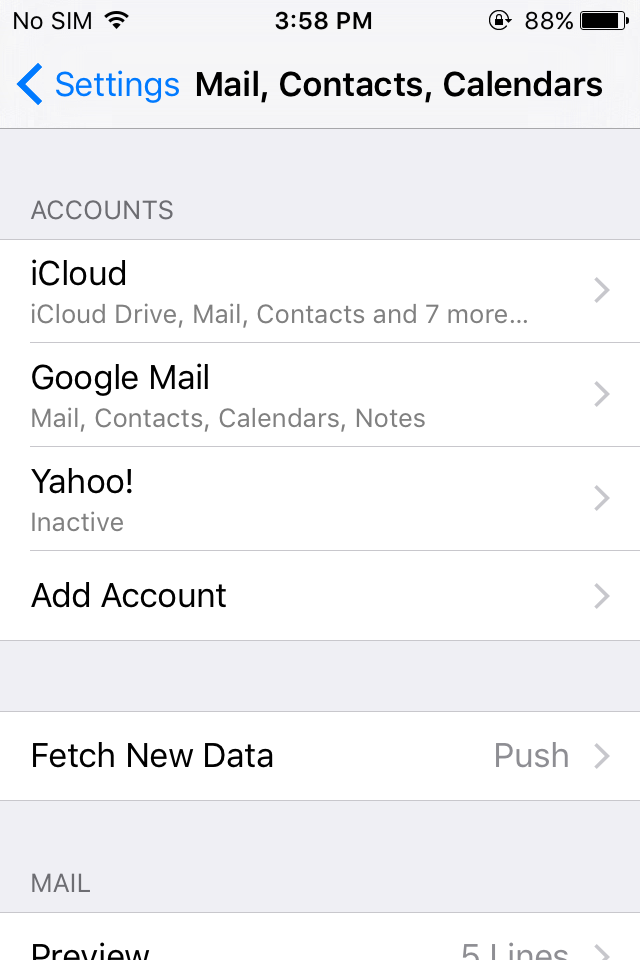
Choose the email account you wish to secure with SSL.
-
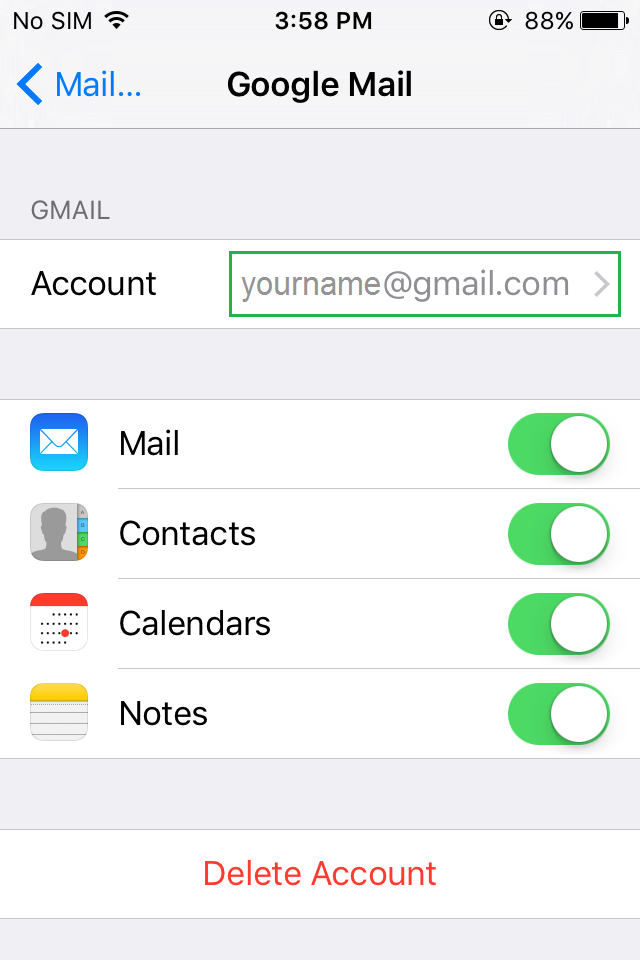
Now, tap on email address under “Account”.
-
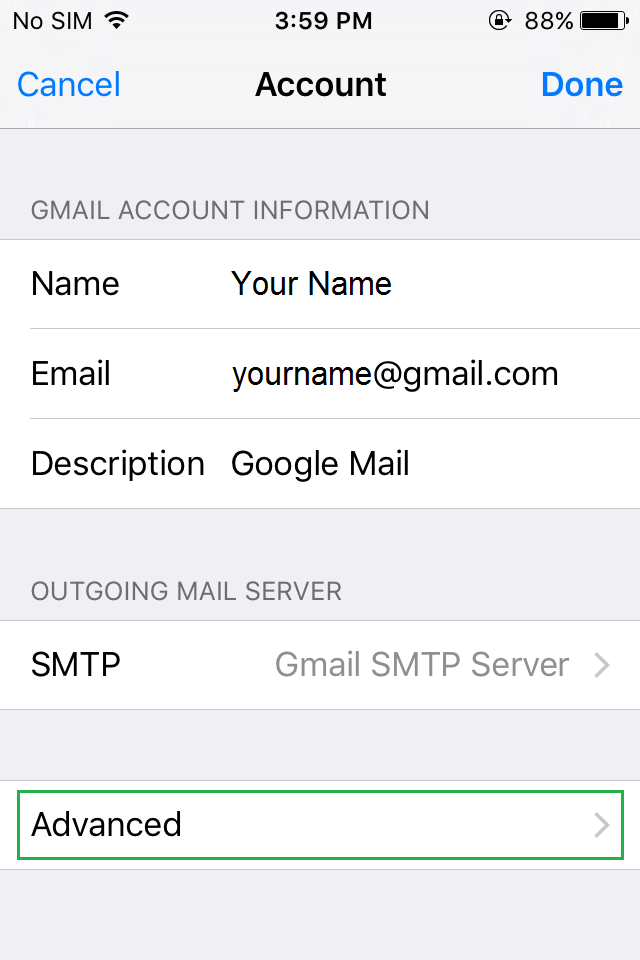
Tap on “Advanced”.
-
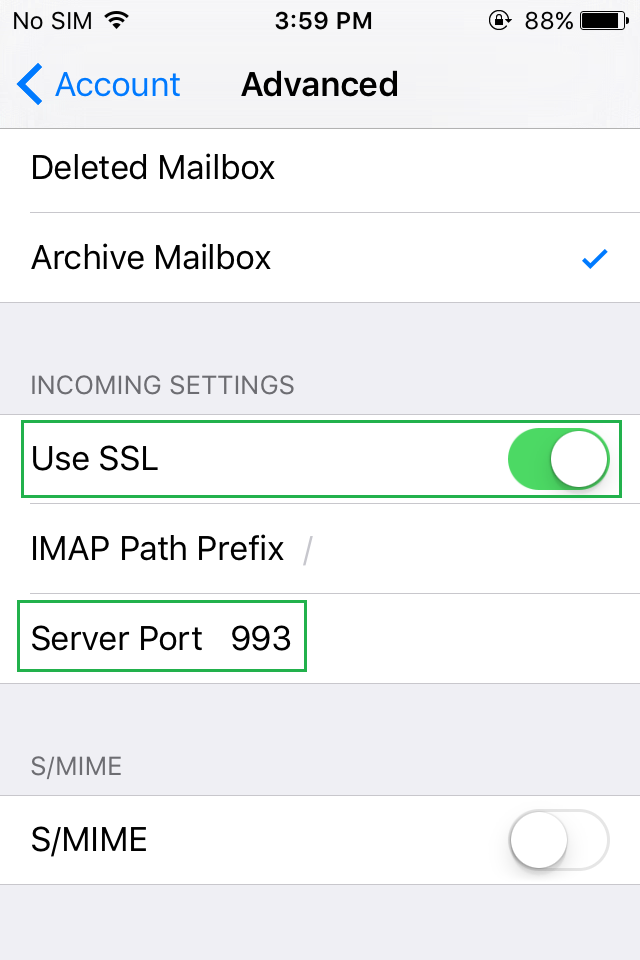
Slide down to turn on “Use SSL” section usually found under “INCOMING SETTINGS”. If you use IMAP then port to “993” and for POP, use port “995”.
Enable SSL on Outgoing Email Server
-
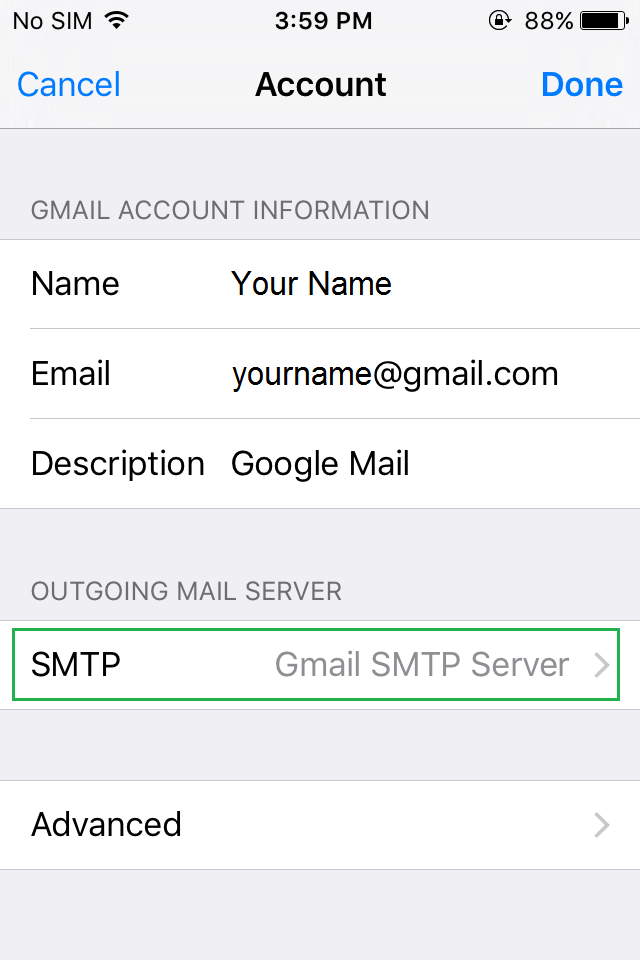
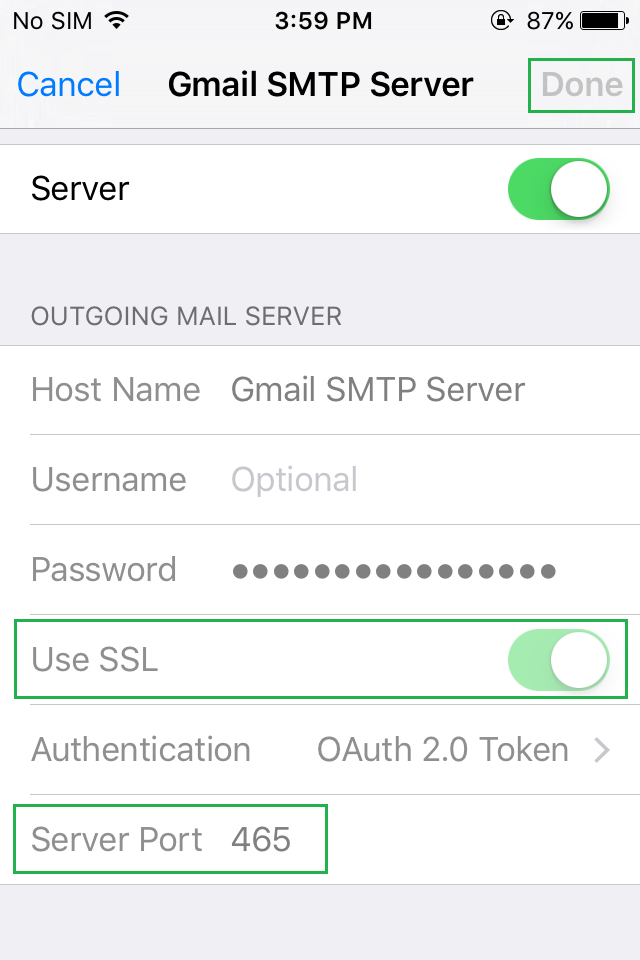
Now go back to “Account” and click on “SMTP” under the “OUTGOING MAIL SERVER”.
-
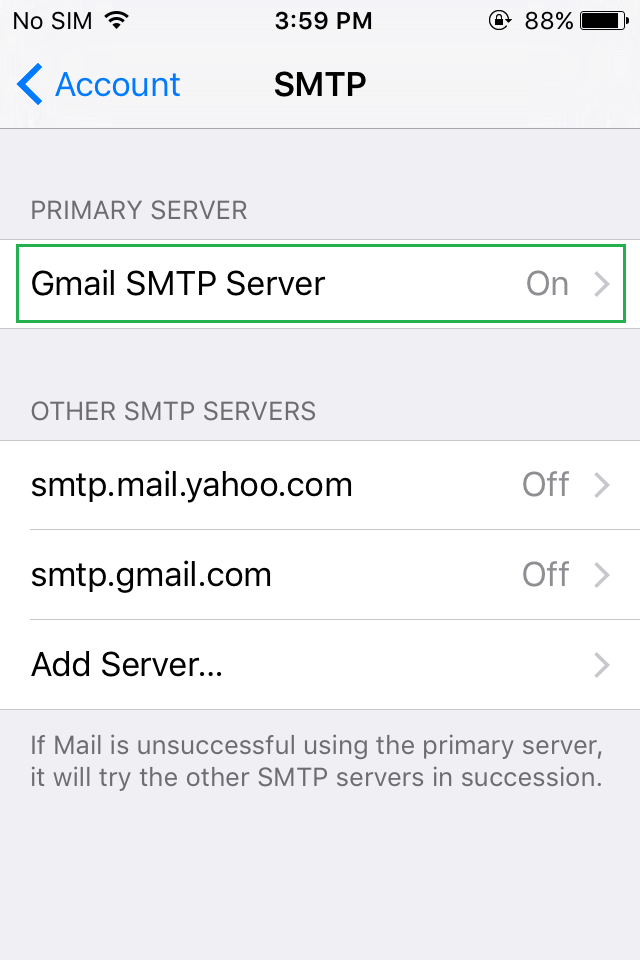
Tap the primary server, where domain server name is assigned.
-
Enable “Use SSL” ON.
- Make sure Server Port is “465”.
- Tap “Done”.
- Now restart iPhone to take SSL effect on your device.

