Detailed guide on Generating CSR on Microsoft Exchange Server 2010. Follow these steps and Generate CSR without any hassle.
Microsoft Exchange Server 2010 was publicly available in 2009 year that came with many lineaments like availability of database, client access server, reduced hardware requirement, personal archive, shadow redundancy for data protection and many other important features that made it viral across enterprises and individuals.
To make smooth and secured mail communication, you need to think about SSL certificate that secures ongoing data and keeps prying eyes away from the information. In this short information, we would like to discuss about SSL installation on MS exchange server 2010. First, we have to generate the CSR (certificate signing request) for exchange server.
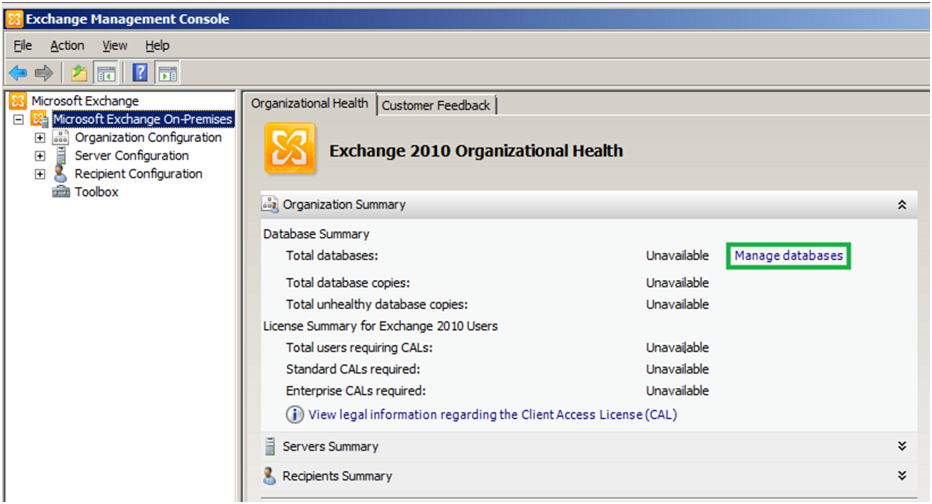
- Browse Start > Programs > Microsoft Exchange 2010 > Exchange Management Console
-
Click Manage databases link.
-
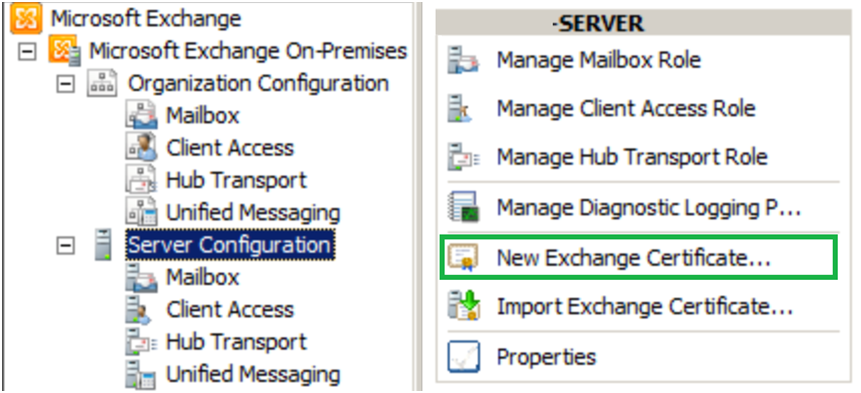
On the left pane, choose server configuration from the menu, then select New Exchange certificate from the right pane.
-
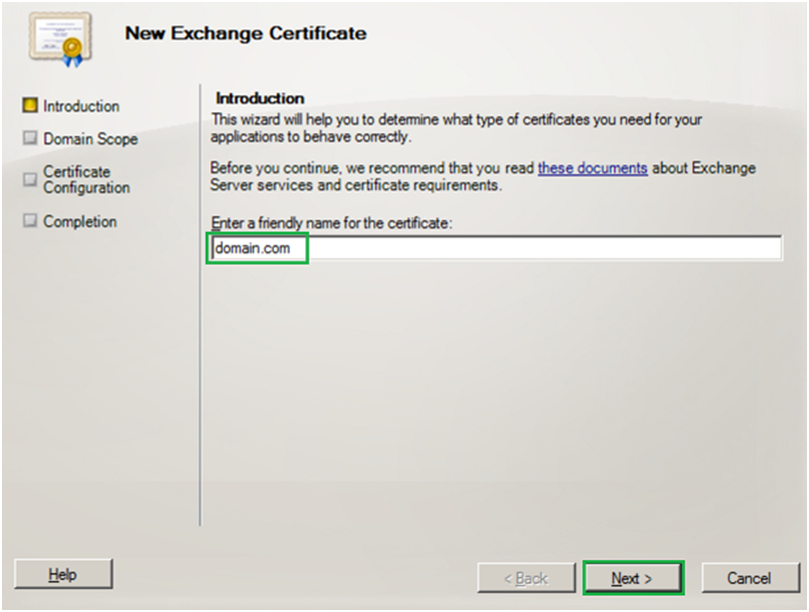
You need to enter friendly name for your certificate and click on Next button.
-
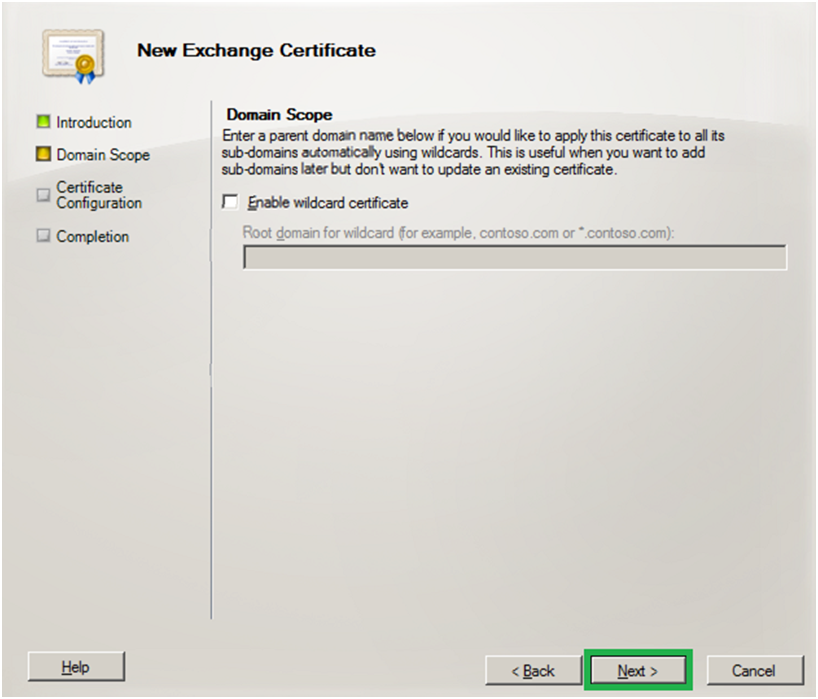
Under Domain Scope, click Next button.
Note: You can check box if you are generating CSR for wildcard, you have to enter root domain name including asterisk (*) and click Next tab. -
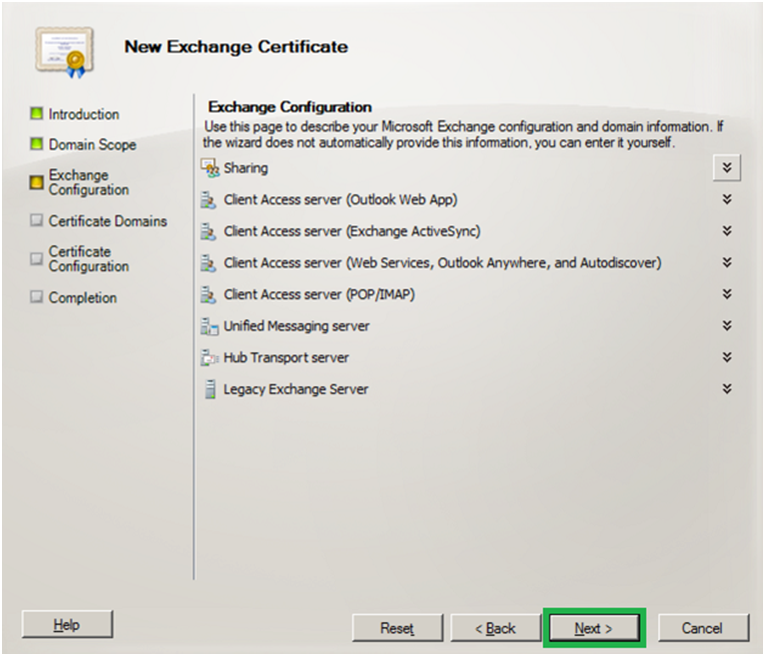
In Exchange Configuration section, select the services for which you want SSL protection and click on Next.
-
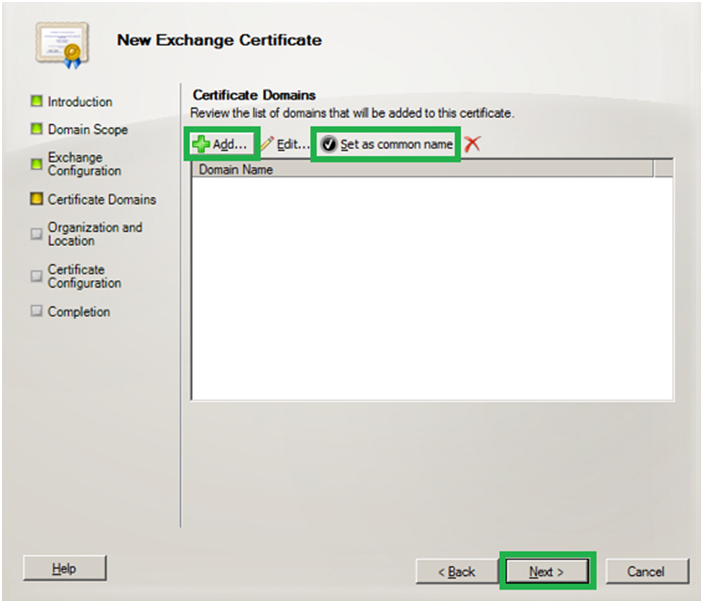
Add common name, and click Set as Common name, then click Next tab.
-
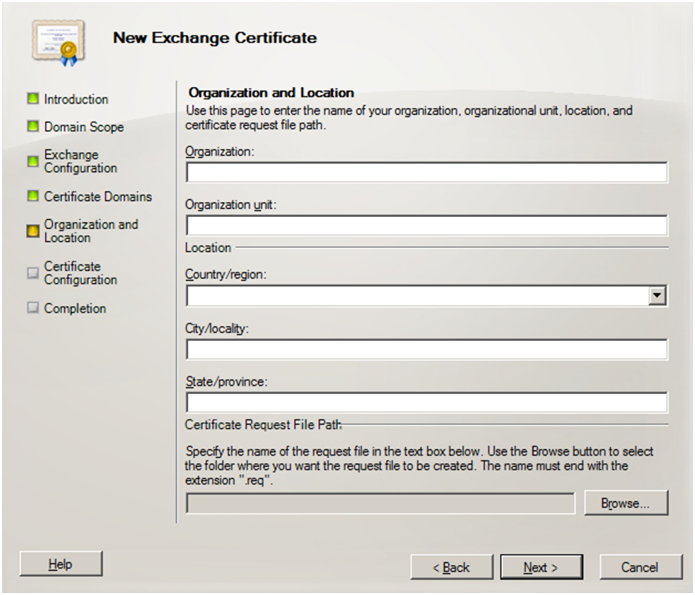
You need to enter organization details to generate CSR.
- Click Browse to save the CSR as .req file.
- Locate the place where you wish to save CSR file, you have to enter file name and click Save.
- From the New Exchange Certificate section click Next, New, and then Finish.
- Open the CSR file, copy the content of the CSR file including BEGIN and END tags, and paste it into a notepad file. The CSR file will be used in SSL certificate purchase process.
